
How to Rebuild an RC Differential Properly
22/10/2026
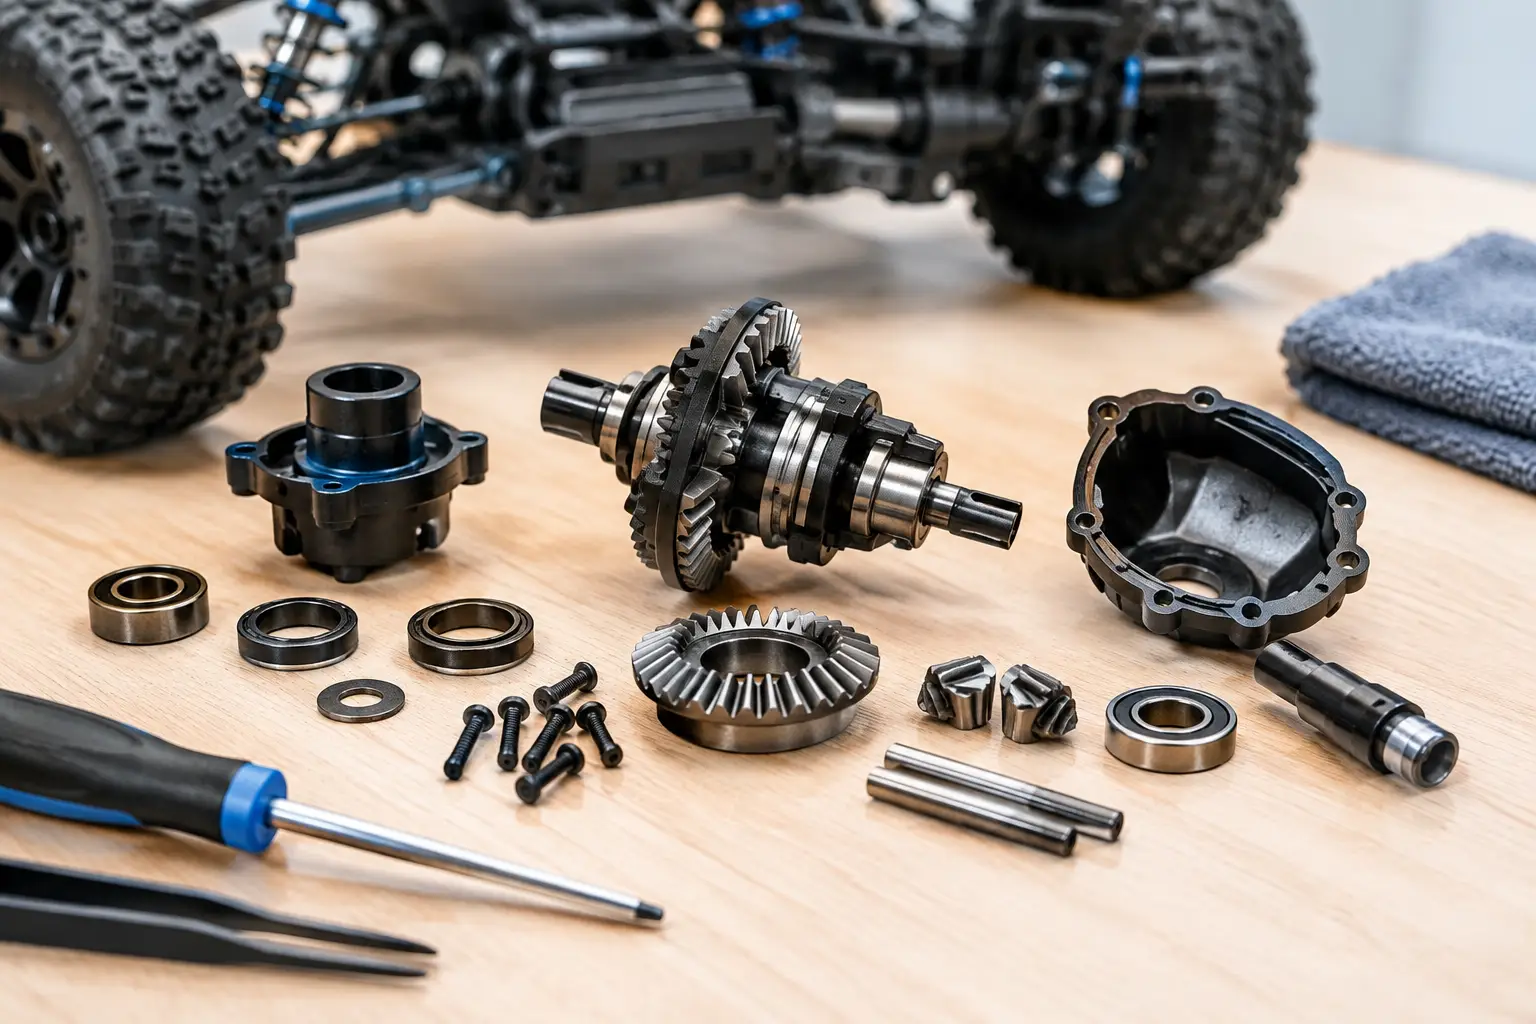
How to Rebuild an RC Differential: Step-by-Step Maintenance Guide
A clicking drivetrain, a wheel spinning excessively under acceleration or dark oil leaking from the diff case can all point towards differential trouble. Learning how to rebuild an RC differential helps restore smooth power delivery, improve handling and prevent worn components from causing more expensive damage.
Whether you drive a Traxxas, ARRMA, FTX, Losi, Axial or another hobby-grade RC vehicle, differential maintenance is an important part of keeping your model running properly.
The good news is that rebuilding an RC differential is usually straightforward with the correct tools, replacement parts and a little patience. In this guide, we'll explain how to remove, inspect, clean, lubricate and reassemble a typical sealed gear differential, along with the common mistakes to avoid.
What Does an RC Differential Do?
An RC differential allows the wheels on the same axle to rotate at different speeds when cornering.
When your RC car turns, the outside wheel travels further than the inside wheel. The differential accommodates this difference, helping the vehicle corner smoothly without unnecessary tyre scrubbing or drivetrain strain.
Most hobby-grade RC vehicles use one of several differential arrangements:
-
Sealed gear differentials: Common in modern RC buggies, trucks and bashers. These typically contain bevel gears and silicone differential oil.
-
Grease-filled gear differentials: Found in certain RC models, using manufacturer-specified grease rather than a conventional silicone oil fill.
-
Ball differentials: Often found in racing and older RC platforms. These use differential balls, rings and specialist lubricants, with a separate adjustment procedure.
-
Locked differentials or solid axles: Common in some RC crawlers, where both wheels are driven together without conventional differential action.
This guide focuses primarily on sealed gear differentials. Always check your vehicle's manual before servicing a different design.
Signs Your RC Differential Needs Rebuilding
A damaged or poorly maintained differential can affect acceleration, cornering and overall drivetrain reliability.
Common warning signs include:
-
Clicking under acceleration: May indicate damaged differential gears, poor gear mesh or excessive backlash.
-
Grinding or crunching sounds: Could suggest worn teeth, damaged bearings or contamination inside the gearbox.
-
Oil leaking from the differential: Often caused by worn O-rings, damaged gaskets or a distorted diff housing.
-
One wheel spinning excessively: Can indicate incorrect differential action, although normal unloading can also occur with an open differential.
-
Inconsistent handling: Changes in traction, steering response or acceleration can sometimes indicate degraded differential oil.
-
Excessive drivetrain play: May result from worn outdrives, incorrect shimming or damaged gears.
These symptoms do not automatically mean the differential is faulty. Driveshafts, wheel hexes, bearings and transmission gears can produce similar problems.
Before dismantling the differential, inspect the surrounding drivetrain to identify the actual source.
How Often Should You Service an RC Differential?
There is no universal service interval for every RC vehicle.
How frequently a differential needs maintenance depends on the model, driving conditions, power system and how aggressively it is driven.
A racing buggy may benefit from regular oil changes to maintain consistent handling. A powerful brushless basher subjected to hard acceleration and repeated jumps may experience greater drivetrain loads.
Models used in mud, water, sand or wet grass should also be checked for contamination and bearing damage after particularly demanding sessions.
For RC crawlers, differential maintenance depends on whether the axle uses an open or locked arrangement. Our Axial crawler setup guide provides additional advice on crawler setup and performance.
As a general rule, inspect your differential whenever you notice unusual noises, leaking oil, excessive play or changes in how the vehicle drives.
Tools and Parts Needed for an RC Differential Rebuild
Preparing everything before opening the gearbox makes the rebuild easier and reduces the chances of losing small components.
You may need:
-
Correct hex drivers and nut drivers for your RC model
-
Needle-nose pliers and small screwdrivers
-
A clean workbench and magnetic parts tray
-
Paper towels, lint-free cloths and RC-safe cleaner
-
Fresh silicone differential oil of the specified viscosity
-
Replacement differential O-rings and gaskets
-
Suitable gear grease where required
-
Replacement differential gears or outdrives if worn
-
Differential shims and bearings if needed
-
The manufacturer's exploded parts diagram
Important: Silicone differential oil, shock oil and general-purpose grease are not interchangeable. Use the lubricant specified for the particular assembly. Some gear differentials are designed for grease, while ball differentials require different lubrication and adjustment methods.
Taking photographs during disassembly is also worthwhile, particularly if you are rebuilding your first differential.
How to Rebuild an RC Differential Step by Step
Step 1: Remove the Differential From Your RC Car
Start by switching off the vehicle and disconnecting the battery.
Remove the necessary components to access the differential. Depending on your RC model, this may involve removing:
-
Front or rear bumper
-
Skid plate or gearbox cover
-
Driveshafts or centre drive components
-
Suspension pins or associated mounting hardware
-
Differential mounting screws
Follow the manufacturer's instructions, as access arrangements vary considerably between vehicles.
Once removed, inspect the outside of the differential before opening it.
Look for oil leaks, cracks in the housing and damage to the ring gear. Check the bearings for roughness, excessive movement or tight spots.
If the ring gear has chipped or rounded teeth, replacing the internal differential components alone will not resolve the problem.
Step 2: Open the Differential Housing
Place the differential on a clean work surface.
Remove the screws holding the differential case together, then carefully separate the housing or cover.
Some differential designs contain a substantial quantity of silicone oil, so keep a cloth underneath to catch any leakage.
Take note of how the gears, cross pins, shims, washers and seals are positioned.
As you remove each component, lay it out in assembly order.
Pay attention to the condition of the old lubricant.
Clean oil may indicate routine servicing is all that is required. Grey or metallic-looking oil can suggest gear wear, while contaminated or degraded lubricant may indicate the differential has been exposed to dirt or moisture.
Small amounts of discolouration are not conclusive evidence of damage, so inspect the actual components before deciding what to replace.
Step 3: Clean and Inspect the Differential Gears
Remove the internal gears and clean away the old lubricant using a suitable RC-safe cleaner.
Ensure any cleaner is compatible with the plastic, rubber and metal components involved.
Inspect the following parts carefully.
Internal bevel gears: Check the sun gears and planetary or satellite gears for chipped, cracked, pitted or excessively rounded teeth.
Cross pins: Look for grooves or visible wear where the internal gears rotate.
Differential outdrives: Check for deep grooves where the driveshaft pins contact the drive cups.
Differential housing: Inspect for cracks, damaged threads or distorted sealing surfaces.
Bearings: Rotate them by hand and check for roughness, binding or excessive play.
Shims and washers: Make sure the correct components are present and free from damage.
Replace any parts showing significant wear rather than simply cleaning them and reinstalling them.
A damaged gear can quickly wear its mating components, leading to another rebuild shortly afterwards.
Step 4: Replace the Differential O-Rings and Seals
Worn differential seals are a common cause of oil leakage.
Check the O-rings around the outdrive shafts and inspect the main differential gasket where fitted.
Replace any seal that appears:
-
Flattened or compressed
-
Cracked or torn
-
Swollen
-
Hardened
-
Damaged during removal
Even if the old seals appear acceptable, fitting fresh O-rings can be worthwhile during a full rebuild.
Apply a small amount of compatible silicone oil to the O-rings where the manufacturer recommends it. This can help the outdrive shafts pass through without damaging the seals.
Make sure any backing washers and shims are positioned correctly.
Incorrectly fitted seals may allow oil to escape as soon as the differential begins operating.
Step 5: Reassemble the Internal Differential Gears
Reinstall the internal gears in the order shown by the exploded diagram.
Ensure the cross pins are fully seated and the gears are correctly positioned.
Before adding oil, check that the gears engage correctly and move without binding.
If the gears feel excessively loose, inspect the shim arrangement.
Shims help control the clearance between components, but using incorrect sizes can create problems.
Too little clearance may cause binding and excessive wear. Too much clearance can allow the gears to move out of proper engagement.
Do not add random washers to eliminate movement.
Use the exact shim thickness and arrangement recommended for your model.
Step 6: Fill the Differential With the Correct Oil
Choosing the correct RC differential oil is important for both lubrication and handling.
Most sealed gear differentials use silicone oil, with viscosity commonly identified in cSt or manufacturer-specific weight markings.
The correct oil depends on your vehicle and which differential you are servicing.
For a standard rebuild, we recommend starting with the factory-specified oil rather than changing viscosity without a clear reason.
After installing the gears, add the specified amount of oil.
Rotate the internal gears gently to release trapped air bubbles, allowing the oil to settle around the components.
Top up as required according to the manufacturer's instructions.
Avoid overfilling the differential. Excess oil can increase pressure when the housing is assembled and may cause leakage or binding.
Do not assume every diff should be filled to the top. Some manufacturers specify an exact quantity, weight or fill level, which should take priority over general guidance.
Choosing the Right RC Differential Oil Weight
Differential oil viscosity affects how freely the internal gears can rotate relative to each other.
In general:
-
Thinner differential oil: Allows more differential action, often helping the wheels rotate at different speeds more freely.
-
Thicker differential oil: Resists differential action more strongly and can help reduce excessive wheel unloading under power.
-
Very thick differential oil: Can produce behaviour closer to a limited-slip or near-locked arrangement, depending on the differential design.
The effect on handling depends on whether the oil is used in the front, centre or rear differential.
For example, changing centre differential oil on a powerful 4WD RC basher can alter how torque is distributed between the front and rear drivetrains.
Thicker centre oil can reduce excessive front-wheel unloading in some conditions, but it may also change steering, traction and stability.
Front and rear differential changes can affect corner entry, rotation and acceleration.
There is no single oil viscosity that works best for every RC vehicle.
If you are unsure, use the standard oil recommended by the manufacturer and make tuning adjustments only after establishing a reliable baseline.
Step 7: Close and Seal the Differential Housing
Once the internal gears and oil are in place, carefully refit the differential cover or ring-gear assembly.
Check that the gasket sits correctly and that no seals or washers have moved.
Tighten the housing screws gradually and evenly, using a cross pattern where appropriate.
Do not overtighten.
Excessive force can damage plastic threads, distort the housing or cause problems with the sealing surfaces.
Use the manufacturer's torque specification if one is provided.
After assembly, wipe the outside clean and check the differential action.
The assembly should operate smoothly, with resistance appropriate to its oil viscosity and design.
There should be no grinding, excessive binding or obvious signs of oil leakage.
Step 8: Check the Ring and Pinion Gear Mesh
Before reinstalling the gearbox cover, inspect the interaction between the differential ring gear and the input pinion.
Correct gear mesh is essential.
If the gears sit too far apart, excessive backlash can cause clicking, slipping and tooth damage.
If the mesh is too tight, the drivetrain may bind, generate heat or wear prematurely.
Some RC models use shims to position the differential, while others rely on fixed gearbox tolerances.
Only adjust the shim arrangement where the manufacturer's design allows it.
Apply the specified amount of suitable grease to the external ring and pinion gears if required.
Do not use additional grease to compensate for worn gears or incorrect mesh.
Once assembled, rotate the complete drivetrain by hand to check that it moves freely without unusual tight spots.
Step 9: Reinstall and Test the Differential
Reinstall the differential into the gearbox, ensuring the bearings and housing are seated correctly.
Reconnect the driveshafts and replace the gearbox covers, suspension components and mounting hardware.
Before applying power, rotate the drivetrain manually and check for abnormal resistance.
Once everything is secure, reconnect the battery and perform a gentle functional test in a safe area.
Begin with low throttle and listen carefully for clicking or grinding.
Then complete a short, gentle test drive.
Afterwards, inspect the differential housing for fresh oil leaks and check whether the original problem has been resolved.
If the clicking remains, stop and inspect the surrounding drivetrain before continuing to drive.
Common RC Differential Rebuild Mistakes
Even experienced RC enthusiasts can encounter problems during differential maintenance.
Using the Wrong Lubricant
Using the wrong lubricant can affect differential operation and component life.
A sealed oil-filled gear differential, a grease-filled gear differential and a ball differential may require completely different products.
Always follow the manufacturer's lubrication instructions.
Overfilling the Differential
Too much differential oil can make assembly difficult and contribute to leakage.
Follow the specified fill level rather than filling the housing completely.
Reusing Damaged O-Rings
Old seals may appear serviceable but still fail to prevent oil leakage.
Replace worn, hardened or damaged O-rings during the rebuild.
Incorrect Differential Shimming
Incorrect shimming can cause excessive backlash or gear binding.
Use the correct shim sizes rather than adding extra washers without checking the manufacturer’s specifications.
Ignoring Worn Bearings
A rough differential bearing can create grinding noises and place additional loads on the gears.
Replace damaged bearings before completing the rebuild.
Changing Too Many Settings at Once
Changing differential oil weight, gear shimming and other drivetrain settings simultaneously makes troubleshooting more difficult.
For routine servicing, restore the original configuration first.
Why Is My RC Differential Still Clicking After Rebuilding?
If your differential continues clicking after maintenance, the fault may be outside the internal differential gears.
Possible causes include:
-
Worn ring and pinion gears
-
Excessive gear backlash
-
Incorrect differential shimming
-
Damaged driveshaft pins or outdrive cups
-
Worn wheel hexes
-
Loose drivetrain components
-
Damaged gearbox bearings
-
Slipping or worn transmission components
If the clicking only occurs under heavy acceleration, inspect the drivetrain under the relevant load conditions rather than relying entirely on how the gears feel when turned by hand.
Avoid repeated full-throttle testing while a drivetrain fault remains unresolved.
RC Differential Rebuild FAQs
Can I rebuild an RC differential myself?
Yes. Most hobby-grade RC gear differentials can be rebuilt with basic model-specific tools, the correct replacement parts and the manufacturer's exploded diagram.
The most important steps are keeping the components clean, maintaining their correct assembly order and checking gear condition before reassembly.
How do I know if my RC differential is damaged?
Clicking, grinding, oil leakage, excessive play and unusual drivetrain behaviour are common warning signs.
However, these symptoms can also originate from driveshafts, bearings or transmission components, so inspect the complete drivetrain before replacing parts.
Can I use grease instead of differential oil?
Only if the particular differential is designed to use grease.
Many sealed gear differentials require silicone differential oil, while certain gear differentials and ball differentials use specific greases or lubricants.
Using an unsuitable substitute can change the differential's performance.
What happens if I use thicker RC diff oil?
Thicker oil generally increases resistance to differential action.
This can reduce wheel unloading in some situations, but it can also change steering, traction and cornering behaviour.
The result depends on your vehicle and which differential is being adjusted.
Do I need to replace differential O-rings every time?
Not necessarily. However, replacing O-rings during a complete rebuild is often sensible, particularly if they are damaged, flattened, hardened or already leaking.
Always inspect the seals carefully before reusing them.
Why is my RC differential leaking oil?
Common causes include damaged O-rings, incorrectly fitted gaskets, excessive oil fill, worn outdrive sealing surfaces and damaged or distorted differential cases.
Check the seals and housing before simply topping up the lubricant.
How long does an RC differential rebuild take?
The time depends on the vehicle's design, accessibility and the condition of the components.
Models with easy gearbox access are generally quicker to service than vehicles requiring extensive suspension or chassis disassembly.
Allow additional time for cleaning, inspection and any replacement parts.
Keep Your RC Differential Running Smoothly
A properly maintained differential helps an RC car deliver consistent power, predictable handling and smoother drivetrain operation.
Whether you are maintaining a racing buggy, servicing a powerful brushless basher or repairing an older RC model, careful inspection and correct assembly are more important than rushing through the job.
Remember to use the correct differential oil or grease, replace damaged seals, inspect the gears and check the complete drivetrain before returning your RC car to regular use.
If you need replacement differential gears, outdrives, bearings, seals or other maintenance components, identify your exact model and version before ordering.
Our guide to buying RC car spare parts online explains how to find compatible replacement parts and avoid common ordering mistakes.
At RC Model Shop UK, we offer a wide range of RC vehicles, spare parts and accessories for hobbyists looking to maintain, repair or upgrade their models.
Choosing the correct components and following the manufacturer's instructions will help keep your RC vehicle performing at its best.
Written by RC Model Shop UK
RC Model Shop UK provides RC vehicles, spare parts, accessories and practical guidance to help enthusiasts maintain, repair and enjoy their models.