
Vitavon Axial Build Example for Serious Crawlers
10/09/2026
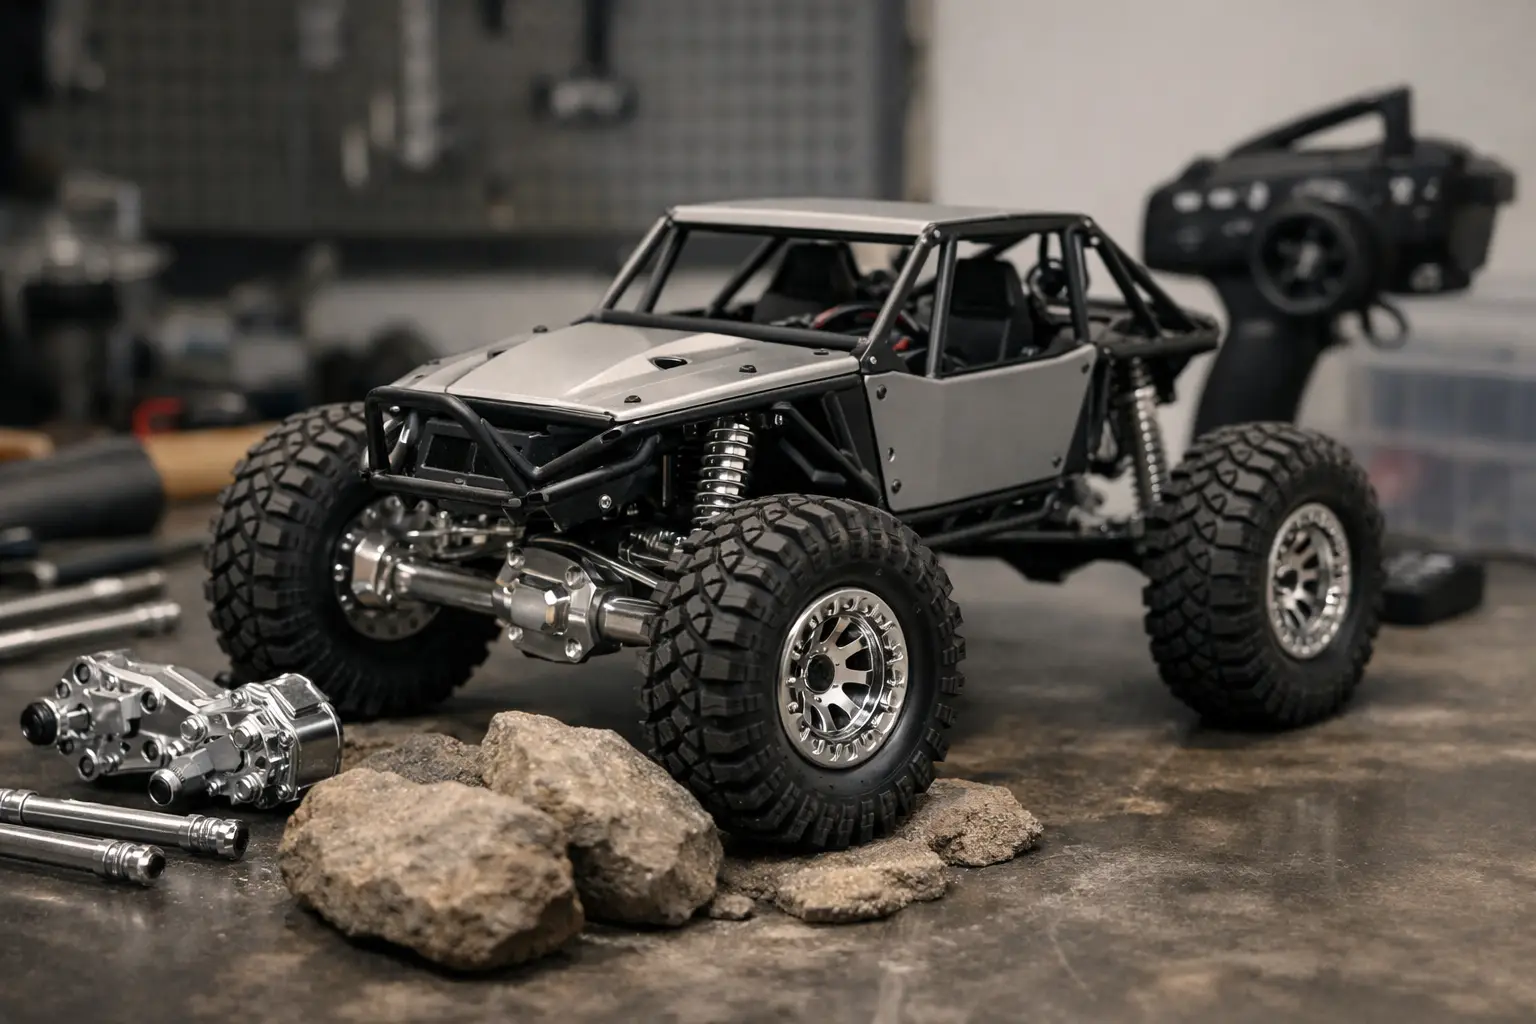
A good Vitavon Axial build is not about fitting every machined aluminium component available. The best crawler builds improve the areas that actually limit the vehicle while keeping the drivetrain, steering and suspension working together.
For a capable Axial trail or rock crawler, that will often mean improving axle strength and steering accuracy, placing additional weight where it provides a genuine benefit and choosing dependable electronics that give good control when the terrain becomes difficult.
This build example is aimed at an Axial-based scale crawler used properly outdoors on woodland trails, loose climbs, roots, rocks and wet British terrain.
The same principles can be adapted to platforms such as the Axial SCX10 range, Capra and larger Axial crawlers. However, exact compatibility should always be checked against the specific vehicle version, axle type and manufacturer's part number before ordering upgrades.
You can also browse our full range of Vitavon RC upgrades, including compatible components for a range of Axial platforms.
Start with the purpose of your Axial build
Before buying upgrades, decide what you actually want the crawler to do.
A lightweight trail truck on 1.9-inch tyres needs a different setup from a heavy-bodied crawler designed for steep rock sections.
Vitavon components can significantly change the strength, weight and construction of an RC crawler, but more metal is not automatically better.
For this example, the target is a dependable 1/10-scale Axial crawler with:
-
Improved steering accuracy
-
Greater durability
-
Better weight distribution
-
A low centre of gravity
-
Good trail reliability
-
Predictable crawling performance
It should still behave like a practical scale crawler rather than becoming unnecessarily heavy.
Start with a sound base vehicle.
Before upgrading anything, check that the transmission turns freely, driveshafts are in good condition, bearings are smooth and the chassis is straight.
Premium axle and steering components cannot compensate for a worn transmission, badly adjusted gear mesh, damaged bearing or binding drivetrain.
Vitavon Axial axle upgrades
The axle assembly is one of the most logical places to consider upgrading on a hard-used crawler.
Axles can experience significant loads when tyres suddenly gain traction, when a wheel becomes trapped between rocks or when torque is applied while climbing.
Compatible Vitavon RC upgrades include machined components for several Axial platforms, including selected Capra, SCX10 III and SCX6 applications.
The objective when upgrading an axle is not simply to replace plastic with aluminium. A quality axle assembly should keep bearings, gears and steering components correctly aligned under load while maintaining smooth drivetrain operation.
Build each axle carefully on the bench rather than transferring components quickly from the original housing.
Check bearings before assembly
Inspect every bearing before fitting it into a new axle housing.
A bearing that already feels rough, notchy or loose should be replaced rather than fitted into an expensive new housing.
Once assembled, rotate the axle manually before installing it in the chassis.
There should be no obvious binding or abnormal resistance.
Check gear mesh carefully
Where differential, ring and pinion or portal gears are transferred into a replacement housing, check their alignment carefully.
Use a suitable lubricant according to the manufacturer's recommendations and make sure gears rotate freely throughout a complete revolution.
Do not assume that tightening every screw as hard as possible improves the assembly. Fasteners should be tightened appropriately without distorting components or damaging threads.
Portal axle considerations
If your Axial crawler uses portal axles, the portal assemblies deserve the same attention as the main differential housing.
Portal axles provide additional ground clearance by moving the axle centreline above the wheel centre, but they introduce additional gears and bearings at each wheel.
When assembling or upgrading portal components, check:
-
Gear condition
-
Bearing condition
-
Smooth rotation
-
Correct assembly
-
Fastener security
-
Wheel-end play
Any binding at the portal becomes additional resistance that the motor and drivetrain have to overcome.
Keep crawler weight low and useful
Adding weight to an RC crawler can improve stability and climbing performance, but placement matters far more than simply making the vehicle heavier.
Brass portal components, steering knuckles and other axle-mounted weights place mass low in the chassis.
This can help keep the tyres planted and lower the crawler's centre of gravity on steep sections.
Adding slightly more useful weight towards the front can also help a crawler maintain front tyre contact when climbing.
However, there is a limit.
Excessive unsprung weight can make the suspension less responsive and increase the loads placed on bearings, axle shafts, steering components and drivetrain parts.
Start with modest changes, test the crawler and add further weight only if it solves a genuine handling problem.
For many trail builds, careful battery placement and tyre choice can achieve a significant improvement without filling every available component with brass.
Upgrade the steering to match the axles
If you are improving axle rigidity, it makes sense to check the steering system at the same time.
Flex in steering links, servo mounts or steering components can reduce accuracy and make an otherwise strong axle feel vague.
Depending on the Axial platform, possible improvements include:
-
Stronger steering links
-
Upgraded steering knuckles
-
Improved servo mounting
-
Correctly fitted servo horn
-
Higher-quality steering servo
A quality waterproof crawler steering servo can provide more torque and control, particularly once larger tyres or additional axle weight have been fitted.
However, servo power requirements need to be considered carefully.
Higher-performance servos may require more voltage or current than the standard ESC BEC is designed to supply.
Check the servo, receiver and ESC specifications before increasing BEC voltage or adding a separate BEC.
Set steering endpoints correctly
Do not allow the servo to continue pushing once the steering has reached its mechanical limit.
Use the transmitter's endpoint adjustment where available so the servo stops before the steering components bind.
This reduces unnecessary stress on:
-
Servo gears
-
Servo horn
-
Steering links
-
Steering knuckles
-
BEC and electrical system
With the crawler supported safely, turn the steering slowly from lock to lock and check for binding, rubbing or continued servo strain at full steering angle.
Choose the right crawler motor and ESC
For technical crawling, smooth low-speed control is normally more useful than maximum speed.
A quality sensored brushless system can provide very smooth throttle response at low speed, making it particularly useful for technical rock crawling.
A brushed motor remains a practical option for many trail crawlers because it can offer good low-speed control at a lower cost.
Our guide to brushed vs brushless RC motors explains the main differences.
For this type of Axial build, prioritise:
-
Smooth throttle response
-
Low-speed control
-
Suitable torque
-
Sensible gearing
-
Reliability
Do not choose a motor purely from its headline RPM or speed potential.
Gear the crawler sensibly
Motor, ESC and gearing need to work together.
Start with gearing that is appropriate for the vehicle and motor manufacturer's recommendations, then check temperatures after driving.
If the motor or ESC consistently becomes excessively hot, investigate gearing and drivetrain resistance before simply adding more cooling.
A binding drivetrain, oversized tyres or overly aggressive gearing can all increase electrical and mechanical load.
Do not upgrade driveshafts automatically
Heavy-duty driveshafts can be worthwhile where standard components are worn, twisting or regularly failing.
However, making one section of a drivetrain much stronger can simply move the next failure point somewhere more expensive.
If the standard driveshaft effectively acts as a relatively inexpensive weak point during a severe jam or impact, replacing it with a much stronger component could transfer that load into the gearbox, differential or axle gears.
The aim should be a balanced drivetrain rather than an indestructible-looking parts list.
Set the suspension after adding weight
Suspension should be tuned once the main build is close to its finished running weight.
That means installing:
-
Axle upgrades
-
Battery
-
Electronics
-
Wheels and tyres
-
Body
-
Major accessories
before making final spring and damping adjustments.
Otherwise, you are tuning a crawler whose weight distribution will change as soon as the build is completed.
Aim for enough suspension travel to maintain tyre contact over uneven terrain without allowing the chassis to drag constantly.
Avoid unnecessarily stiff springs
A common response to a heavier crawler is fitting much stiffer springs.
That may make the vehicle sit higher on the bench, but overly stiff suspension can reduce articulation and mechanical grip.
If the crawler rolls too easily, investigate the cause rather than automatically increasing spring stiffness.
Possible improvements include lowering the battery, reducing high-mounted body weight and adjusting overall weight distribution.
Tyres can make more difference than aluminium
Tyres remain one of the most cost-effective performance changes on almost any crawler.
Choose tyres based on the terrain you actually drive on.
Soft compounds can provide excellent grip on rocks, roots and technical trail surfaces, while different tread designs suit mud, loose soil and mixed terrain differently.
Tyre inserts or foams also affect how the crawler behaves.
An overly soft tyre can fold during side loads and make steering feel vague. An insert that is too firm can prevent the tyre from conforming to uneven terrain.
Tyres, inserts and vehicle weight should therefore be considered together.
Keep the body and accessories practical
Scale accessories can transform the appearance of an Axial crawler, but they can also quickly increase its centre of gravity.
Heavy roof racks, spare wheels and accessories mounted high on the body can noticeably change climbing and side-hill performance.
Keep heavy equipment as low as practical.
Body trimming should generally be limited to what is needed for tyre and suspension clearance.
A lower body position can also help improve stability, provided it does not interfere with the tyres throughout suspension travel.
A sensible Vitavon Axial build order
Upgrading in stages makes it easier to understand what each modification actually changed.
A sensible order would be:
-
Inspect and service the standard vehicle.
-
Build and check the axle assemblies.
-
Install steering components.
-
Set servo endpoints.
-
Check the complete drivetrain for binding.
-
Install the chosen motor and ESC setup.
-
Position the battery and electronics.
-
Fit the wheels, tyres and body.
-
Set the suspension at finished running weight.
-
Test the crawler before adding further weight or upgrades.
Changing everything at once makes it much harder to identify the cause if the finished crawler develops a problem.
Check the crawler after the first few runs
New components can settle slightly during their first few runs.
After the first few battery packs, inspect:
-
Wheel nuts
-
Steering fasteners
-
Suspension links
-
Axle fasteners
-
Bearings
-
Driveshafts
-
Gear operation
-
Servo mounting
This early inspection can identify loose hardware or unusual wear before it becomes a larger problem.
Carrying a small RC tool kit, wheel nut driver and a few common spares on longer trail sessions is also worthwhile.
Frequently Asked Questions
Are Vitavon upgrades worth fitting to an Axial crawler?
They can be, particularly when you are addressing a specific weakness or building a crawler for harder use. Machined axle, steering, drivetrain and suspension components can improve strength or rigidity, but there is little benefit in replacing components purely because an aluminium version exists.
Can I fit Vitavon upgrades to an Axial SCX10?
Vitavon produces upgrades for selected Axial platforms, but compatibility varies between generations and individual models. Always check the exact vehicle and Vitavon part number before ordering.
Are Vitavon parts available for the Axial Capra?
Yes, selected Vitavon upgrades are available for Capra applications. Compatibility should still be checked against your exact version before purchase.
Should I add brass parts to my Axial crawler?
Brass components can help lower the centre of gravity and place weight around the axle, but adding too much weight can increase stress on the drivetrain and reduce suspension responsiveness. Add weight gradually and test the crawler between changes.
Is aluminium always better than plastic on an RC crawler?
No. Aluminium can provide additional rigidity and strength, but plastic components can flex during impacts and may act as relatively inexpensive sacrificial parts. Upgrade components where there is a genuine performance, durability or reliability benefit.
What should I upgrade first on an Axial crawler?
That depends on how the crawler is used. Tyres, steering setup and weight distribution often produce noticeable improvements before major drivetrain modifications are needed. If a particular component is repeatedly failing or flexing, that becomes a more logical upgrade target.
Where can I buy Vitavon Axial upgrades in the UK?
RC Model Shop UK stocks a large range of Vitavon RC upgrades, including selected upgrades for Axial Capra, SCX10 III and SCX6 platforms. If the Vitavon part you need is not currently listed, contact us with the exact product or part number and we can check availability.
Shop Vitavon RC upgrades in the UK
A successful Axial build is about creating a crawler that works as a complete package.
Strong axles are useful, but they need suitable steering. Additional weight can improve climbing, but only when it is placed correctly. A powerful servo is worthwhile, but only when the electrical system can supply it properly.
Upgrade one area at a time, test the crawler on the terrain you actually use and allow real-world performance to determine what needs improving next.
RC Model Shop UK stocks an extensive range of Vitavon RC upgrades covering Axial and many other popular RC platforms. If you are unsure whether a Vitavon component fits your crawler, contact us with the exact Axial model and the Vitavon part number before ordering.
Written by RC Model Shop UK